CHECK ROW CLEANERS:
Properly functioning row cleaners are essential for consistent seed placement and emergence.
- Inspect for loose bearings and worn pivot bushings to ensure clean soil contact for seeds. Spin each row cleaner to ensure you don’t have any loose bearings.
- Check that pivot bushings are tight. If any of these maintenance items need to be taken care of, you’ll want to address them before planting season.
SPRING PLANTER CHECKLIST
Plant with confidence this season. A well-prepared planter is the key to strong emergence, uniform stands, and maximum yield potential. In this spring planter checklist, we cover the essential steps to help you fine-tune your equipment and reduce downtime. From meter calibration to row unit inspections, make sure your planter is set up for success before the first pass.
ASK US A QUESTION
CHECK PARALLEL ARM BUSHINGS:
Parallel arm bushings play a key role in maintaining consistent planting depth and spacing.
- Inspect parallel arms for wear to ensure smooth row-unit movement. Worn bushings can lead to inconsistent depth, uneven emergence, and row-unit chatter during operation.
- Check for wear at the parallel arm pivot points by moving the row unit vertically and horizontally from the rear. Any excessive movement indicates the bushings may need to be replaced.
- If wear is difficult to gauge, replace the bushings on one row unit and compare.
CHECK KEETON SEED FIRMERS
Keeton seed firmers ensure consistent seed-to-soil contact for improved germination.
- Inspect the seed firmer for proper shape and tension to ensure it consistently spaces seed at the bottom of the trench.
- Check that the firmer is riding in the bottom of the trench and replace it if it’s worn into a V-shape.
CHECK SEED TUBES:
Seed tubes are critical for maintaining accurate seed pacing and proper furrow formation.
- Inspect seed tubes for wear at the bottom where the disc opener can contact the bottom of the seed tube.
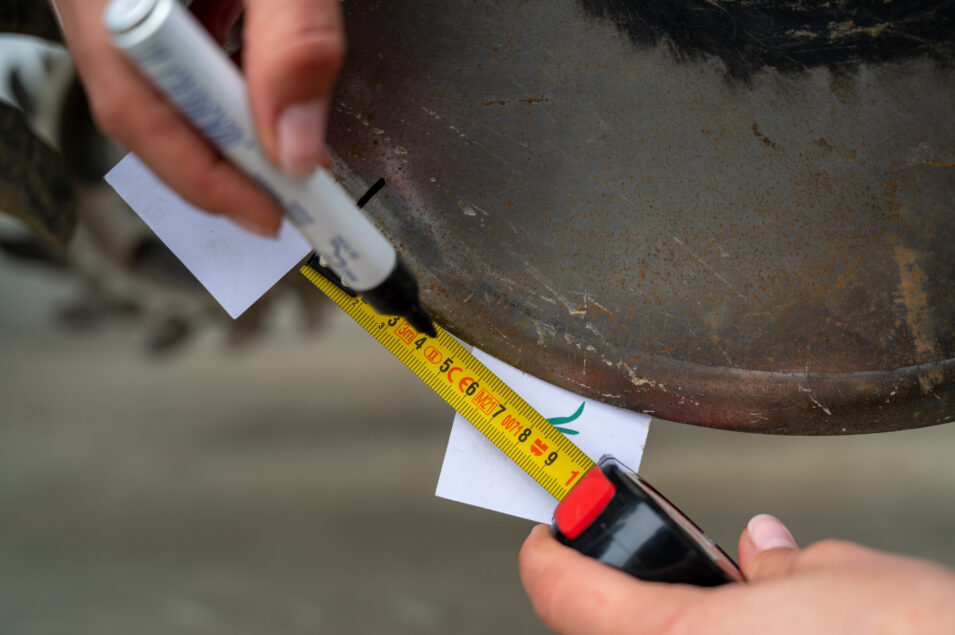
- Measure seed tube guards to ensure they meet minimum width specifications of at least 3/4″ at the start of the season. Replace any guards that flow below this threshold (new guards measure 15/16″). Replace seed tube guards whenever installing new opener discs to maintain optimal performance and protection.
CHECK SPEEDTUBES
SpeedTubes are crucial for planting at high speeds without sacrificing seed spacing or yield.
- Inspect feeder wheels; these should be replaced if wear is present.
- Check the drive pulley for wear of any kind.
- Inspect the belt for any missing paddles or damage.
- Inspect the idler pulley for any wear; this should hold the belt in the center alignment of the housing.
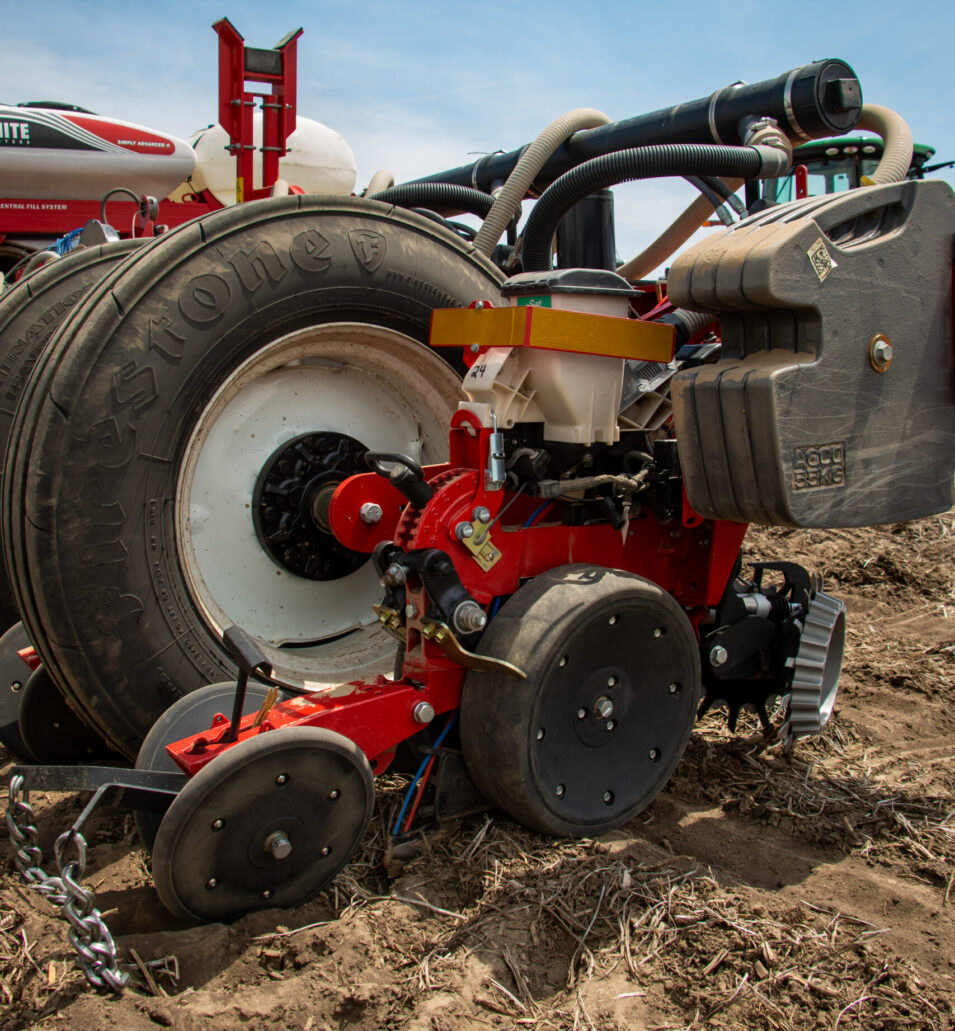
CHECK DISC OPENERS:
Disc openers are responsible for creating a clean, consistent V-shaped furrow for proper seed placement.
- Inspect disc opener diameter and replace blades once they have worn 1/2″ from their original size.
- Check blade contact to ensure 1″ – 2″ of contact between discs. Replace the guard at the same time as the disc openers.
- Use the business card method to verify contact: insert one card from the bottom and the one from the top. If the card pulls through easily, remove shims to increase contact; if contact is too tight, add shims. After setting contact, rotate the blades and mark them to confirm consistent contact at multiple points around the disc.
CHECK GAUGE WHEEL SHIMMING:
Proper gauge wheel adjustment is critical for maintaining a consistent moisture environment and uniform emergence.
- Inspect gauge wheels for wear by lifting the wheel into planting position and checking for excessive movement. Replace worn components as needed.
- Adjust gauge wheels to create a tight seal against the disc opener. The wheel should rotate freely while maintaining slight contact, creating consistent scrubbing action.
CHECK DEPTH ADJUSTMENT LINKAGE:
Depth adjustment linkage is crucial as it determines how deep a seed is placed in the furrow.
- Inspect key components – including the depth adjustment handle, depth stop, and gauge wheel arm for signs of wear or excessive movement.
- Look for visible wear such as grooves, divots, or missing material on contact points. Excessive wear can lead to unintended planting depth variations.
CHECK CLOSING WHEEL SPACING AND ALIGNMENT:
Proper closing wheel setup ensures the furrow is sealed correctly for optimal seed-to-soil contact and uniform emergence.
- Alignment: Check for excessive side-to-side movement in the closing tail, which may indicate worn bushings or mounting holes. After tightening components, lower the planter on a hard surface, roll forward a few feet, and verify each closing wheel is centered over the row. Adjust as needed.
- Spacing: Set the distance between the closing wheels to achieve a proper trench closer. Wheels set too narrow can pinch the trench and create air pockets around the seed, leading to delayed emergence.
- Pressure: Use a scale under each row unit to confirm consistent downforce across closing wheels. Ensure springs are in good condition and apply even pressure – replace any that show significant variation.
CHECK METER DRIVE SYSTEM:
A smooth, consistent meter drive system is essential for accurate seed spacing and population.
- Inspect chains and sprockets for wear and ensure proper lubrication. Worn components can create vibration – leading to skips, doubles, and uneven spacing. Consider replacing chains annually and checking sprocket teeth for wear.
- Evaluate hex shaft bearings by removing the drive chain and rotating the shaft. Replace any bearings that do not spin smoothly. Then verify hex shaft alignment, especially at fold points.
CHECK METER CALIBRATION:
The meter is the heart of the planter – every seed placed in the furrow starts here.
- Ensure your meter is operating at peak accuracy to maintain consistent spacing and population across every row. Have your meters tested on a MeterMax® Ultra test stand to identify worn components and fine-tune performance before the season.
- Professional calibration helps maximize accuracy in the field, giving you confidence that your planter is delivering the best possible results.
CHECK GENERAL ITEMS:
- Check your operator’s manual to see all the lubrication points that need to be addressed on your planter.
- Ensure tractor tires are inflated evenly across the tractor and at the correct pressure.
- Confirm that the tractor is ballasted properly for the load. Adding liquid or fertilizer tanks to the planter could change your ballasting needs.
CHECK BAR HEIGHT:
Proper bar height ensures row units maintain full travel and consistent planting depth across varying field conditions.
- Set planter bar height so parallel arms run level with the toolbar. If the arms angle upward, row-unit travel is limited, increasing the risk of shallow planting over uneven terrain.
- Maintain approx. 20″ – 22″ of clearance from the frame to the ground.
- Stand behind the planter to confirm the bar is level across the entire width. Check that the center and the wings are aligned to avoid depth inconsistencies across rows.
LEVEL THE PLANTER:
An uneven toolbar limits the row unit’s potential, preventing it from performing as it should.
- If the front of your toolbar is lower than the back of the toolbar, your row cleaners are going to be too aggressive, and you’re not going to achieve the seeding depth that you’re expecting. And your seed firmers and closing system will not have as much pressure on them, and they will not be able to do their jobs well.
- It’s important to get your toolbar leveled out before you head to the field, then double-check and level it out once you get into the field again. If your toolbar isn’t running level, then you need to make an adjustment to the height of the hitch to get your planter toolbar leveled out.
EVALUATE YOUR DOWNFORCE SETTING:
Proper downforce is key to building and maintaining a consistent, high-quality seed furrow.
- Excessive downforce: can compact furrow sidewalls, making it difficult for the closing system to properly seal the trench.
- Too little downforce: results in a loose furrow that lacks structure, allowing the sidewalls to collapse, and introduces dry soil around the seed.
- Correct downforce: gauge wheel tracks should be visible but not overly firm. When checking the furrow, soil should show some movement and crumble easily when lifting – indicating proper structure and good closing conditions.
- Adjust downforce based on field conditions. In drier soil, increase downforce to maintain sidewall integrity. In wetter conditions, reduce downforce to minimize compaction and preserve the seed environment.
FURROW MONITORING:
Monitor population, singulation, and spacing to ensure seeds are being delivered accurately within the furrow.
- Evaluate ride quality to identify row-unit bounce or vibration that can negatively impact seed spacing and placement.
- Track downforce to confirm the planter is maintaining consistent depth while avoiding excessive pressure on the soil.
- Measure furrow moisture and soil temperature to ensure seeds are being placed into an optimal environment for germination and emergence.

HAVE QUESTIONS?
Our team is here to make sure YOU are planting with confidence this spring.